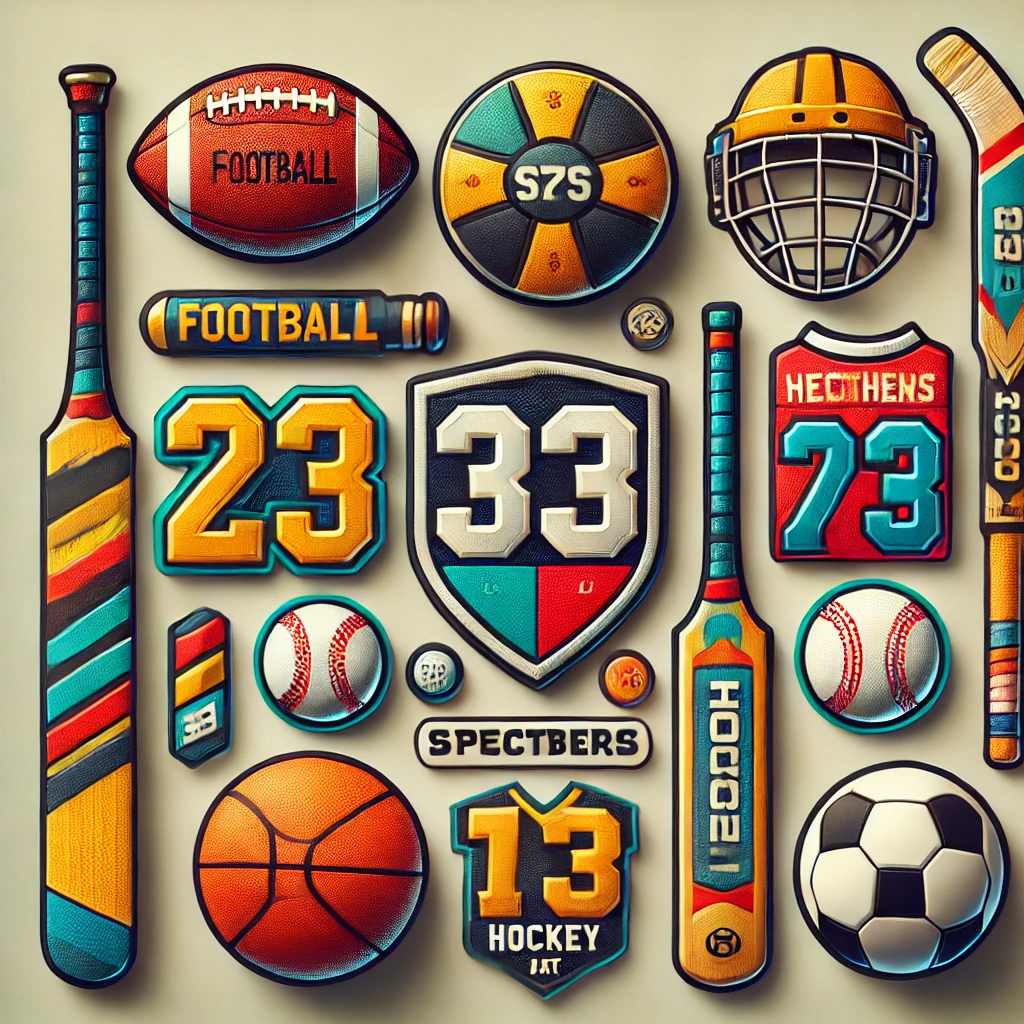
Creating patches is a very popular and creative way to express your association with a particular group, company, institution, cause or ideology but certainly not limited to these. People have been using patches to identify themselves, their teams, staff and employees.
Patches are customized to display exclusive club memberships or even share political or religious beliefs or views, hence you can create custom patches to exercise freedom of expression and freedom of speech in a very trendy, adaptive, scalable and fashionable way. Embroidered patches can be customized for promotions, fund raising and charity events.
Embroidered patches are the more popular patch style among the different styles of patches that are customized by our customers. You can also read a comparison of the features of different styles of patches on our website. Your ability to design the perfect patch can get restricted with the style of patch you choose. So make sure you have the right style of patch in your mind before you start.
Woven Patches vs Embroidered Patches: The Difference
Embroidered Patches vs PVC Patches
What Are Embroidered Patches?
An embroidered patch is an embellishment that is made by stitching embroidery thread on a base fabric like a polyester twill or felt. The designs that are embroidered are often logos or symbols identifying groups, organizations, institutions and communities.
Embroidered patches may also feature artistic images and trendy icons. These kinds of patches are often used for customizing clothes and to display an association with a certain community, company, organization or team. Every patches have their own distinct features and additional options that can be applied to the patches.
Creating your own embroidered patches makes perfect sense. You might want to add unique designs to your clothing, launch a small patch-making business, or design custom patches for your organization. The ability to make embroidered patches with an embroidery machine saves money and puts you in complete creative control.
Making professional-looking embroidered patches turns out to be simpler than most people think. Your workspace can become a patch-making hub with the right tools, materials, and techniques.
This piece guides you through each step to create embroidered patches. You’ll learn everything from material selection to final touches. Let’s begin with the tools you’ll need.
The Process of Manufacturing Embroidered Patches
Manufacturing embroidered patches has come a long way from the hand-sewn method that was relied upon decades ago. In these modern times high-quality and custom embroidered patches are made using computer-controlled embroidery machines.
Essential Materials and Tools
Professional embroidered patches need the right foundation. Let’s look at the materials and tools you need to achieve excellent results.
Choosing the Right Fabric
Quality embroidered patches start with the base fabric. Twill fabric remains the best choice for professional patches. Polyester twill or cotton twill provide excellent stability and a clean, professional finish.
Different applications need specific fabric types:
- Cotton Canvas: Ideal for lightweight patches with good breathability
- Polyester Twill: Perfect for durability and color retention
- Felt: Great for soft, decorative patches
- Denim: Excellent for heavy-duty applications
Tools and Equipment
You’ll need specific tools to create professional embroidered patches. Here’s your essential toolkit:
- Embroidery machine
- Sharp scissors for precise cutting
- Embroidery hoops
- Heat press or iron
- Fabric markers
- Ruler and measuring tape
These high-tech tools and equipment allows custom patch makers like us to create a bulk quantity of embroidered patches at wholesale prices within a short amount of time. Most importantly, they allow for consistency and uniformity in design, quality and stitching for every single patch.
There are different types of embroidery machines available. For a business, it’s best to use high-end multi-needle, multi-head professional embroidery machines. These may have between 9 to 16 needles, to mount more threads and faster production.
Aside from embroidery machines, manufacturers also need a computer, a vector graphics program, and an embroidery digitizing software. These are used for designing and digitizing embroidered patches.
Types of Stabilizers and Threads
Stabilizers are vital in patch creation. Three main stabilizer types serve specific purposes:
- Cut-away Stabilizer: Our preferred choice for most patches that provides permanent support
- Tear-away Stabilizer: Ideal for patches needing lighter backing
- Water-soluble Stabilizer: Perfect for patches with clean edges
High-quality polyester or rayon embroidery threads work best for patches. Polyester threads give excellent durability and colorfastness, making them ideal for patches that need frequent washing.
Heat-seal film makes a great backing material for iron-on capability. A fusible backing works better than spray adhesives and reduces fraying.
Your material’s quality determines the final result. Quality supplies cost more but create patches that look professional and last longer. Start with a test piece to ensure your chosen materials work well together before beginning your actual project.
The Process
Regardless of the kind of embroidery machine or digitizing program used, the process of manufacturing custom made embroidered patches remains the same, . It always starts with creating the design and then digitizing it with the help of digitizing software, so the machine can read the instructions and embroider the patch accordingly.
Once the machine embroiders the design, the patches need to be finished. This means trimming the patch, removing any stabilizers, and attaching the chosen backing material. Lastly, the patches are neatly trimmed and packaged.
Designing the Artwork
Although many customers create their designs on paper the most preferred method is to use a graphics software like Adobe Illustrator or CorelDraw.
Vector graphics programs, like Illustrator and CorelDraw, are generally preferred as they allow designers to resize the designs while retaining clear resolution. However, raster-based programs such as Adobe Photoshop may still be used, the designer would have to deal with limited resolution or image quality.
Make sure you are using the right approach to design your embroidered patches. Once you are done with brainstorming your design ideas and have finally created a design, the next step will be to digitize it.
The design phase will give a professional look to your embroidered patches. Let’s walk through everything you need to know about preparing your design for embroidery.
Creating Digital Designs
Vector-based formats give the best results for our designs. Here’s what works best:
- Choose your design software (Adobe Illustrator, CorelDraw, or Inkscape)
- Create your artwork at the exact size you need it embroidered
- Use clean, simple lines and shapes
- Text should be at least 0.25 inches high to stay readable
- Line thickness needs to stay above 0.05 inches
Digitizing the Artwork
Your basic design needs conversion into a format that your embroidery machine understands. The process is called digitizing and it works like this:
- Save your design as a vector file (preferably AI or PDF format)
- Convert the file through digitizing software
- Choose the appropriate stitch types for different design elements
- Set proper stitch density and direction
- Save in your machine’s required format (like .PES for Brother machines)
Digitizing is a set of embroidery instructions that are programmed with the help of an embroidery digitizing software to instruct the machine on the number, style and size of stitches. It contains every single instruction required for the machines to create an embroidered patch.
Every artwork needs to be digitized before being embroidered. Before digitizing your designs you also need to decide how much embroidered thread coverage is required. There are two main reasons why a digitizing file has to be made.
The first is so that the embroidery machines can read the files. JPEG and PNG files are not accepted or understood by the machines. Depending on the size of design and embroidery coverage a design can have about 1,000 to 100,000 stitches. Each and every single stitch has to be created in the digitizing software according to the artwork so that the machine can stitch on the pattern that has input in the digitizing file. There are different types of embroidery file formats available.
Certain commercial or professional embroidery machines can only read specific formats. As such, it is important to know what types of files an embroidery machine can read before converting or digitizing your artwork.
Here is a list of popular embroidery file types and the embroidery machines they are compatible with:
- .KWK : for Brother
- .DST for Tajima
- .JEF: for Janome and MemoryCraft 10000
- .ART: for Bernina
- .DST: for Tajima, Eltac, and Brother
- .EXP: for Melco
- .DSB: for Barudan
- .TAP: for Happy
- .XXX: for Singer
- .SEW: for MemoryCraft
- .PES and .PEC: for Brother and Babylock
These embroidery machine file formats are all stitch-based. This leads us to the second main reason why vector designs must be digitized for embroidery machines.
The digitized file must specify the types of stitches, sizes, colors, and stitch directions for fills, outlines, overlaps and borders. These stitch-based files also tell the machine the stitching sequence within the design, rules for stitching, and other instructions.
Some popular embroidery digitizing software are Hatch by Wilcom (best for beginners) and the more professional ones that we prefer are Wilcom Embroidery Studio, Husqvarna Premier+ Embroidery Software, and Chroma Premier DIgitizing Software. There is also free digitizing software like Brother Embroidery Design Software and Embird.
How To Digitize a Custom Embroidered Patch Design
Different programs will likely have different actions and tools for digitizing artwork. However, the same work flow is followed:
- Upload or open the logo or chosen artwork in the digitizing software.
- Set the size of the design or logo according to the available space or client specifications.
- Choose the appropriate stitches for different parts of the design. Some programs can auto select parts of the artwork while others may require manual tracing or outline.
- Indicate the stitch direction for each part of the design. This creates the roadmap or sewing flow that the machine will follow. It also helps create varying textures and color shades.
- Select the embroidery thread colors. The total number of colors you can use for the embroidered patch will depend on the type of commercial embroidery machine you use.
- Save the digitized file.
Size and Color Considerations
Size and color choices substantially affect your final result. These vital factors make all the difference:
Size Guidelines:
- Small patches (2-3 inches): Best for simple designs
- Medium patches (3-4 inches): Ideal for moderate detail
- Large patches (4+ inches): Suitable for complex designs
Color Selection: The Pantone Matching System (PMS) helps us match colors accurately. This system maintains consistency across materials and production runs. Here’s what you should know about colors:
- Thread colors should contrast well with your base fabric
- Keep your design to 5-6 colors for quick production
- Metallic threads can create special effects
- Neon colors should be avoided unless specifically needed
Pro Tip: A digital proof before production lets you check if the design works and make adjustments for the best outcome.
Bold and clean designs create the most professional-looking patches. Note that very small details or text might not embroider well.
Setting Up the Embroidery Machine
Once the artwork or logo is converted into the appropriate embroidery file format for your machine, it can be uploaded onto the machine firmware. This is easily done using a USB drive, memory card, or any file transfer device the embroidery machine accepts.
The first step in setting up the embroidery machine is to ensure the machine reads the file properly. Then, prepare and select the right needles, threads, orientation, and embroidery sequence. Depending on the machine and digitizing program, it is also possible to indicate the orientation and embroidery sequence on the file itself.
Make sure the embroidery machine has all the necessary thread colors to embroider the design and the threads are mounted on the appropriate needles. Refer to the digitized file and load the thread colors onto the machine.
Professional embroidered patches require proper machine setup as their foundation. Time spent to adjust your embroidery machine will save you hours of troubleshooting down the road.
Machine Settings and Calibration
Your machine needs proper adjustment before starting any patch project. The first step involves cleaning and oiling the machine based on manufacturer’s guidelines. The embroidery hoop needs to be adjusted so the needle lines up exactly in the center of the template hole.
These setup steps are vital:
- Clean the bobbin area really well
- Install a fresh needle (size 75/11 for most patch projects)
- Register the hoop size in the machine’s settings
- Adjust the hoop position using the machine’s built-in tools
- Test if everything lines up using a practice piece
Hooping Techniques
Professional-looking patches depend on proper hooping techniques. The hoop should be adjusted to match your fabric’s thickness before you start. This step prevents hoop burn and will give a consistent tension throughout your project.
The hooping process works best when you:
- Place the bottom hoop on a flat surface
- Layer stabilizer and fabric properly
- Press the top hoop down in one swift motion
- Check for drum-tight tension without over-tightening
- Use the template to center everything perfectly
Thread Tension Adjustment
Clean, professional patches need the right thread tension. The bobbin tension should be set between 18 to 22 grams. Cap patches work better with a 25-gram tension.
Your top thread tension looks right when:
- The underside shows 1/3 bobbin thread
- The top surface has no loops or puckers
- Thread stays flat against the fabric
- No bobbin thread appears on the top surface
The bobbin case needs cleaning before adjusting tensions to get accurate readings. Compressed air helps clean the bobbin case before each project and maintains steady tension while making patches.
Polyester threads need slightly higher tensions than rayon to prevent looping. This careful attention to tension details creates patches with clean, professional stitches that last long.
Embroidering the Patch
Let’s tuck into the actual patch embroidery process now that our machine is ready. Professional embroidered patches need precise steps and close attention to detail.
Running the Border Stitches
A professional, finished look comes from the border. The first step shows where to place the patch material. Here’s our tested process that creates clean, professional borders:
- Run a placement line to mark the patch position
- Place the patch material within the outline
- Secure with a tacking run (1-3 passes of straight stitch)
- Add a zigzag stitch to hold initially
- Complete with a full-density border column
Traditional patches need an overlock edge (also called a merrowed border). You run the border stitching after cutting the patch from the span. A wide satin stitch border (at least 3mm) works great to capture fabric fibers for embroidered-edge patches made on standard machines.
Adding Design Elements
The central design comes after securing borders. The best results come from running main decorative elements before the final border. This order is vital because it:
- Prevents border from compromising the stabilizer
- Lets design elements run properly under the border
- Cuts down patch movement during production
- Will give a cleaner final look
We keep thread tension steady and watch stitch quality closely when adding design elements. Patches that need frequent washing get higher stitch density to last longer.
Quality Control During Stitching
Quality control runs through our entire stitching process. We keep an eye on these things during production:
- Thread tension stays consistent
- No design puckering
- Border stitches line up and stay uniform
- Design elements sit in proper position
- No thread breaks or loose ends
Fixing problems right away during production saves time and improves results. We stop the machine and fix any thread breaks before moving forward. Complex designs need checks at significant points to adjust alignment.
Regular checks of border quality and design placement help keep multiple patches consistent. The edges need extra attention since they show quality issues most clearly.
Patches with detailed designs need careful monitoring of stitch density. Too many stitches bunch up the fabric, while gaps appear with too few. This balance creates patches that look professional and handle regular use and washing.
Note that details make professional embroidered patches stand out. Each step builds on the last one. Your attention during stitching creates a final product worth showing off.
Creating Borders
There are two different types of borders used in creating custom-made embroidered patches. Each has its advantages and disadvantages, depending on the type of patch and its intended use. The available border options are laser cut stitched border and merrow border. The laser cut or hot cut stitched border can be done on the same embroidery machine for merrow broder you will need an overlock stitch machine.
Choosing the right border for custom embroidered patches not only completes its appearance but also ensures the patches are secure on the edges look clean and sharp and fray from the edges
Laser Cut / Hot Cut Borders
Laser-cut borders are also referred to as hot cut or satin stitch borders. These are the most commonly used type of border for embroidery patches. They are also much simpler to make than merrow borders.
For laser cut or hot cut borders, custom embroidered patch makers simply need to stitch the border directly onto the patch. Once the patch is embroidered and the stabilizer is removed, all that’s left is to cut around the patch as close as possible using a laser cutter.
This allows laser-cut borders to be thinner and less pronounced than merrow borders. Hot cut borders are preferable for patches with complex or unique shapes and angles.
Merrow Borders
Merrow or overlocked borders give patches a traditional or classic embroidered look. As its name suggests, this type of border has an overlock stitch wrapping around the edge of the patch.
This forms a thicker border that is usually around two to four millimeters wide. A merrow border prevents frayed edges and threads, thus improving the durability of the patch.
Merrow borders are often used on patches that are shaped like circles and squares. It is easier to create overlocked merrow borders on simpler shapes or shapes without a lot of sharp turns and angles.
Cutting and Trimming
Embroidered patches still need to be cut and trimmed. After removing the embroidery hoop or frame with the newly made patches, you can roughly cut out the designs and remove the stabilizer.
Once the stabilizer is removed, you can trim the patch right to its border. Make sure the workstation has proper lighting for a clean and close cut. Curved embroidery scissors, which have thicker blades, are great for cutting and trimming patches.
For satin stitched or hot cut borders, laser cutters are the best option. However, you can also use a hot knife in place of a laser cutter to trim the patch closely and further seal the edges. Lightly running a flame over the sides or edges of a close-cut satin stitched border also seals edges and gets rid of any stray threads.
Removing Stabilizers
These materials are placed underneath the fabric where the patches will be embroidered to ensure it remains firm, taut, and stable. They prevent puckering and wrinkled or lumpy patches.
There are three popular types of backings or stabilizers:
- Tearaway backings: Affordable and specially designed to be torn in any direction. Using this type of backing can help minimize cutting mishaps and ruining the patch. These are best used for already stable fabrics.
- Cutaway backings: This type of backing is perfect for delicate, stretch fabrics and for custom-made embroidered patches that have high stitch counts. Cutaway backing provides a stiff base both before and after embroidering the design.
- Water-soluble stabilizer: Although it is a type of backing, water-soluble stabilizers are applied to the front of the fabric, rather than the back. These types of stabilizers are removed by running the patch through a stream of water. Additionally, they are often used together with tearaway backing and on high-profile fabrics.
Make sure to follow the manufacturer’s directions on how to remove the embroidery stabilizers. When using water-soluble stabilizers, it is important to dry the custom embroidered patch completely before putting any adhesive.
Finishing Touches
The finishing touches transform an amateur patch into a professional masterpiece after the embroidery process. Let me guide you through the final steps to create patches that look like they came from a professional workshop.
Trimming and Cleaning
Perfect trimming is a vital part of creating professional-looking patches. Here’s how to get those perfect edges:
- Let the patch cool completely after embroidery
- Remove the patch carefully from the hoop
- Cut around the border stitch, leaving about 1/8 inch margin
- Trim any excess stabilizer from the back
- Clean up loose threads with sharp scissors
- Remove any remaining water-soluble stabilizer with a damp cloth
Pro Tip: Sharp fabric scissors dedicated to patch-making will give clean cuts and prevent fraying.
Apply Backings
Backings refer to the attachment options that are applied on the back of patches, after cutting and trimming the patches. Backings are used to attach the patch to clothes and other articles and objects. It is the final step in manufacturing embroidered patches.
One popular backing option is the iron-on backing. As the name denotes, this type of backing allows us to attach embroidered patches to any fabric or clothing without the need to sew it on by just using a heated iron over the patches to attach it. Other types of backing are velcro (hook and loop), magnetic, button loop, peel and stick, and plastic backing.
Your choice of backing material impacts the patch’s application method and durability. Here are the best options we’ve tested:
- Iron-on Backing: Perfect for permanent attachment
- Apply heat-seal film to the patch’s back
- Press with iron at 330°F on top and 320°F on bottom
- Hold for 50-55 seconds to get optimal adhesion
- Plastic Backing: Adds stiffness and support
- Keeps patches flat over time
- Works best for sew-on applications
- Makes patches more durable
- Adhesive Backing: Best for temporary applications
- Works well for single events
- Quick to apply and remove
- Not suitable for washable items
Our foolproof process for iron-on backing starts with a clean, dry patch. Cut the backing material slightly smaller than the patch to prevent adhesive from seeping out during application. Press firmly and evenly across the entire patch surface to get the best results.
Important Safety Note: Use a pressing cloth between the iron and patch to protect both items from damage.
Patches that see heavy use benefit from combined methods – adhesive backing plus sewn edges. This approach maximizes durability while keeping a professional look.
Quality finishing can elevate even simple patches to professional standards. Extra care during these final steps ensures patches that look great and last long. Test your chosen backing method on a sample patch before working on the final piece.
Hook-and-loop (Velcro) backing works best for patches that need frequent removal and reattachment. This option is popular in military and tactical applications because it offers both security and flexibility.
Make a Sample
It is important to do a test run for each newly digitized embroidery design. How the artwork looks on the screen may translate or look different once embroidered. Design simplification will also have to be considered as very complex and intricate designs cannot be translated into embroidery.
Before mass producing embroidered patches, we make sure to check how the design looks and whether there is anything that can be improved upon. More often than not, an embroidered patch requires tweaking to fully translate the digital design in to quality embroidered patches. Have a look at embroidered patch samples we have made in the past for our customers.
Common Troubleshooting Tips
Patch-making can be tricky even for seasoned embroiderers. Here are the most common problems we face and how to fix them.
Fixing Thread Breaks
Thread breaks can stop your work dead in its tracks. Most breaks happen because of wrong tension or threading. Here’s the quickest way to solve thread breaks:
- Check Threading Path
- Re-thread the machine with presser foot up
- Make sure thread goes through all guides
- Check if the bobbin sits right
- Adjust Tension Settings
- Adjust top tension until you see 1/3 bobbin thread underneath
- Clean any lint from bobbin case tension spring
- Use thread tension gauge to get it right
Important: We’ve found that 60% of thread breaks happen because of dull or damaged needles. Change your needle first before trying anything else.
If threads keep breaking, look at these things:
- Thread quality and age
- Machine speed (slow it down if needed)
- Needle size matching thread
- Sticky residue on needle
Addressing Puckering Issues
Bad puckering makes patches look amateur. There are three main types that hurt patch quality:
The Bunching Pucker:This happens when fabric gets stuck while stitching. Here’s how to stop it:
- Stitch from inside to outside
- Pick the right stabilizer weight
- Keep hooping tension even
The Stretching Pucker:The fabric gets pulled too tight in the hoop. You can fix this by:
- Hooping fabric without pulling
- Using the right stabilizer mix
- Changing design density as needed
The Density Pucker:Too many stitches in one spot cause this. Here’s the fix:
- Lower stitch density during digitizing
- Pick the right stabilizer
- Set thread tension correctly
Solving Design Alignment Problems
Misaligned designs usually come from:
- Bad Hooping
- Fabric shifts during stitching
- Big hoops and slick fabrics cause trouble
- The fix: Get metal spring hoops or add sticky paper to old ones
- Stabilizer Problems
- Wrong stabilizer for your fabric
- The fix: Cutaway stabilizer works best for stretch
- Spray temporary adhesive between layers
- Design Quality Issues
- Poor digitizing leads to alignment problems
- The fix: Test your design on stable fabric
- Redesign if problems don’t go away
These techniques help nail the alignment:
- Mark centers clearly
- Stick target stickers for placement
- Test on scrap fabric first
- Watch those first stitches closely
Pro Tip: Tough fabrics need multiple stabilizer layers instead of just one. A cutaway stabilizer with adhesive spray helps nail the alignment on stretchy stuff.
Your machine’s calibration needs regular checks. Small hoop position errors can mess up patch designs badly. Check the calibration first if alignment problems keep showing up.
A step-by-step approach to these fixes helps solve most patch-making problems. Spot issues early and fix them right away.
Place Your Order
At Ultra Patches we make sure that your designs are embroidered as accurately as possible, therefore we show samples for your approval before mass production. We follow all industry best practices to ensure that your designs are accurately translated in to beautiful looking embroidered patches. We handle design simplifications, digitizing and the whole manufacturing process for you.
If you want to make custom embroidered patches and have your design ready just fill out the price quote form on the website and our sales representative will contact you with a price quote or give us a call on 541-248-8831. We will be happy to help and guide through the whole process.